
This guide covers Jenn-Air Microwave Installation & Setup with practical, technician-backed advice.
This guide covers Jenn-Air Jenn 11 with practical, technician-backed advice.
A Jenn-Air built-in or over-the-range microwave installation involves more structural and electrical planning than most homeowners expect. Whether you’re installing a microwave drawer beneath a counter, a built-in wall unit paired with a wall oven, or an over-the-range model, getting the mounting, venting, and electrical connections right up front prevents problems that are much harder to fix once cabinetry is finished around the unit.
Understanding the Jenn-Air Microwave Installation & Setup
Below, our specialists break down everything you need to know about the Jenn-Air Microwave Installation & Setup.
Understanding the Jenn-Air Jenn 11
Below, our specialists break down everything you need to know about the Jenn-Air Jenn 11.
Structural Support Varies by Configuration
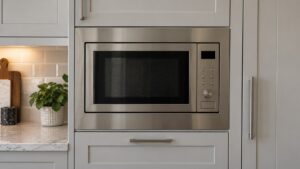
Built-in wall microwaves, often installed in a stack above or below a wall oven, need a cabinet cutout built to the exact dimensions and weight rating of the specific model, since these units are heavier than countertop microwaves and rely entirely on the surrounding cabinet for support. Microwave drawers, mounted beneath a countertop, need a base cabinet reinforced to support the drawer’s full weight when extended and loaded with dishes — an underbuilt cabinet can sag or the drawer mechanism can bind over time.
Over-the-Range Models Need Proper Venting
If you’re installing an over-the-range microwave, its built-in ventilation fan needs to either duct to the exterior or, if configured for recirculating mode, have its charcoal filter properly seated. Ducted venting must be sized correctly and routed without excessive bends that reduce airflow, since insufficient venting reduces the unit’s ability to clear cooking smoke and steam. This model type also needs a minimum clearance above the range below it, both for safety and for microwave performance.
Electrical Requirements
Most Jenn-Air microwaves run on a dedicated 120-volt circuit, though higher-wattage built-in models may specify a higher-amperage requirement — check the specific model’s rating plate rather than assuming a standard household outlet is sufficient. The circuit should not be shared with other major kitchen appliances to avoid nuisance breaker trips during use.
Trim Kits for a Built-In Look
Built-in wall microwaves typically require a trim kit matched to the cabinet opening size, which frames the unit for a flush, seamless appearance consistent with the rest of a Jenn-Air kitchen suite. Selecting the wrong trim kit size, or skipping it altogether, is a common DIY mistake that leaves visible gaps around the unit — trim kits are model-specific and not universally interchangeable.
Alignment With Paired Wall Ovens
When a microwave is installed above or below a matching wall oven in a stacked configuration, alignment between the two units matters visually as well as functionally — both need level, flush mounting for the combined installation to look and operate as designed. This is one of the more finicky parts of a built-in kitchen installation and benefits from a technician experienced with stacked configurations.
Test Before Regular Use
After installation, run the microwave through a test heating cycle, confirm venting draws air properly if it’s an over-the-range unit, and connect Wi-Fi for JennAir Connect-enabled models. This confirms the electrical and mechanical setup is correct before you rely on it for daily cooking.
Weight and Reach Make This a Two-Person Job
Lifting a built-in microwave into an elevated wall cutout is awkward even for an experienced installer working alone, since the unit needs to be held level and steady while it’s secured to the cabinet, often at shoulder height or above. Attempting this solo increases the risk of dropping the unit or damaging surrounding cabinetry, which is part of why professional installers typically work in pairs for this specific job, using proper lifting technique and temporary support braces to hold the unit in place while it’s fastened. Rushing this step alone is one of the more common causes of installation-related cosmetic damage on an otherwise flawless kitchen build.
Professional Installation Protects the Result
Given the structural, venting, and electrical variables across microwave drawer, built-in, and over-the-range configurations, professional installation is the safest way to get a clean, functional result. Schedule your microwave installation, review our installation services, or check specific model requirements before ordering a trim kit. Jenn-Air’s product specifications list current cutout and clearance details.