This guide covers Jenn-Air Wall Oven Installation & with practical, technician-backed advice.
This guide covers Jenn-Air Jenn 13 with practical, technician-backed advice.
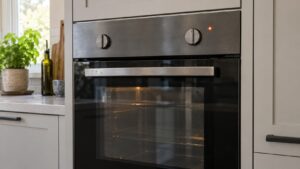
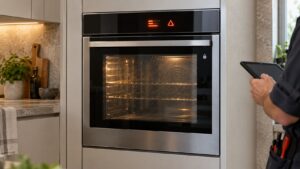
A Jenn-Air wall oven is a heavy, built-in appliance that gets mounted into a cabinet cutout, which makes correct installation more demanding than a freestanding range. Between structural weight support, dedicated electrical wiring, and precise trim alignment for the seamless built-in look Jenn-Air is known for, wall oven installation is a job where getting it right the first time really matters.
Understanding the Jenn-Air Wall Oven Installation &
Below, our specialists break down everything you need to know about the Jenn-Air Wall Oven Installation &.
Understanding the Jenn-Air Jenn 13
Below, our specialists break down everything you need to know about the Jenn-Air Jenn 13.
The Cabinet Must Support the Oven’s Full Weight
Single and double wall ovens are substantial — often 150-250+ pounds depending on configuration — and the cabinet framing has to be built to support that weight indefinitely, not just during installation. Support rails or a sturdy shelf inside the cabinet opening bear this load, and if the surrounding cabinetry wasn’t built with oven installation in mind, reinforcement may be needed before the oven goes in. Skipping this step risks the cabinet sagging or the oven shifting out of alignment over time.
Electrical Requirements Are Non-Negotiable
Wall ovens require a dedicated 240-volt circuit sized to the specific model, run to a junction box positioned correctly within the cabinet cavity — not simply spliced into an existing outlet circuit. Double wall oven configurations draw even more power and may require a higher-amperage circuit. This wiring should be verified against your local electrical code and the oven’s specific rating plate before the unit is ever powered on.
Trim Kit and Flush-Mount Alignment
Part of what makes a Jenn-Air wall oven look built-in rather than bolted-on is precise trim alignment — the oven’s face frame needs to sit flush with surrounding cabinetry, with even reveals on all sides. This requires careful shimming and leveling during installation, since even a small misalignment is visually obvious on a prominent kitchen fixture like a wall oven. If you’re installing alongside a matching microwave or warming drawer in a stacked configuration, alignment between units matters even more.
Ventilation and Clearance Behind the Unit
Wall ovens generate heat that needs a clear path to dissipate behind and around the unit — most models specify minimum clearances that must be maintained even after cabinetry and trim are finished. Blocking this clearance with insulation or tightly packed cabinetry can cause the oven to run hotter than intended and can shorten the lifespan of internal components like the control board.
First-Use Calibration
After installation, run the oven through a preheat cycle and verify the temperature display responds normally, connect JennAir Connect Wi-Fi if applicable, and run an initial self-clean cycle to clear manufacturing residue before regular cooking. This is also the point where any transport-related problem, such as a loose connector, would typically show up — better to catch it during setup than mid-holiday dinner.
Double Wall Ovens Add Extra Planning Steps
A double wall oven installation involves two full oven cavities stacked in a single tall cabinet, which roughly doubles the weight the cabinet needs to support and often calls for a higher-amperage electrical circuit than a single oven requires. Confirming the combined weight rating of the cabinet and verifying the correct circuit sizing before delivery day prevents a situation where the ovens arrive but the surrounding structure isn’t actually ready to receive them.
Moving and Positioning the Oven Safely
Given the weight involved, moving a wall oven into position typically requires more than one person and appropriate equipment to avoid injury or damage to cabinetry during the final push into the cutout. This is another practical reason professional installation makes sense — experienced installers have the tools and technique to maneuver a heavy oven into a tight opening without scratching cabinetry or straining the installer.
Have It Installed by a Professional
Given the combined weight, electrical, and alignment demands, wall oven installation is best left to an experienced technician who can verify structural support and wiring meet spec before final trim-out. Schedule a wall oven installation, see our full installation services, or check cutout and electrical requirements for your specific model. Jenn-Air’s official specifications are a useful reference during cabinet planning.