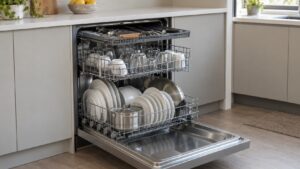

This guide covers Jenn-Air Dishwasher Installation & Setup with practical, technician-backed advice.
This guide covers Jenn-Air Jenn 12 with practical, technician-backed advice.
Installing a Jenn-Air dishwasher looks simple on the surface — slide it into the cabinet opening, hook up water and power — but a handful of details determine whether it runs quietly and washes effectively for years or develops leaks and drainage problems within months. Here’s what matters during setup.
Understanding the Jenn-Air Dishwasher Installation & Setup
Below, our specialists break down everything you need to know about the Jenn-Air Dishwasher Installation & Setup.
Understanding the Jenn-Air Jenn 12
Below, our specialists break down everything you need to know about the Jenn-Air Jenn 12.
Leveling Affects Wash Performance and Noise
A dishwasher that isn’t level won’t distribute water evenly across its wash arms, which directly affects how well the TriFecta wash system cleans dishes on all three racks. An unlevel unit is also more likely to run noisily, since components and the door seal don’t sit as designed. Installers use a level across the top edge of the unit and adjust the leveling legs at each corner until it’s true in both directions — this takes only a few minutes but is one of the most commonly skipped steps in DIY installs.
Water Supply and Shutoff Access
The dishwasher needs a dedicated hot water line with an accessible shutoff valve, ideally reachable without removing the unit. Using an old or reused water line at installation is a common source of early leaks — even a hairline crack in aging supply tubing that wasn’t visible before installation can fail under pressure once connected. New installations should always use a new supply line rated for dishwasher connections.
Drain Line Routing Prevents Backflow
The drain hose needs to loop upward — typically secured under the countertop — before connecting to the garbage disposal or drain line, creating a high loop that prevents dirty sink water from siphoning back into the dishwasher. Skipping this high loop is one of the most common causes of dishwashers that seem to have “dirty water” issues right after installation, and it’s purely a plumbing routing mistake rather than an appliance defect.
Electrical Connection
Most Jenn-Air dishwashers connect to a dedicated 120-volt circuit, either hardwired or through a dedicated outlet, depending on local code and the specific model. This circuit should not be shared with a garbage disposal or other high-draw kitchen appliance, since simultaneous use can trip the breaker mid-cycle and interrupt a wash.
Cabinet Fit and Front Panel Alignment
Jenn-Air dishwashers are designed to sit flush with surrounding cabinetry for a seamless built-in appearance. Confirm the cabinet opening width matches spec with a small margin for adjustment, and align the front panel evenly with adjacent cabinet doors during final installation — this is a cosmetic detail, but it’s the first thing anyone notices about a poorly installed dishwasher.
First Cycle and JennAir Connect Setup
Run an empty first cycle after installation to flush any manufacturing residue from the internal plumbing before washing actual dishes, and connect JennAir Connect Wi-Fi during this run if your model supports smart features. This is also when you’ll notice if the leveling or water connection needs a final adjustment, since a first cycle reveals any leaks or drainage issues immediately.
Anchoring Prevents Movement During Cycles
Beyond leveling, the dishwasher needs to be securely anchored to the underside of the countertop using mounting brackets included with the unit. Without this anchoring, the wash motor’s vibration during a cycle can gradually shift the dishwasher’s position over months of use, eventually straining the water and drain connections at the back of the unit. This is a quick step during installation but one that’s easy to skip when rushing to finish a kitchen project, and it’s often the hidden cause behind a dishwasher that seems to “walk” forward slightly over months of continuous use.
Get It Installed Right the First Time
A correctly installed dishwasher should run quietly, drain cleanly, and wash evenly from day one — problems that show up early are almost always installation issues rather than appliance defects. Our technicians handle leveling, water line, and drain routing correctly on every Jenn-Air dishwasher install. Schedule an installation, browse our services, or check model-specific cabinet requirements. See jennair.com for current dishwasher specifications.