
This guide covers Jenn-Air Wine Cooler Installation & with practical, technician-backed advice.
This guide covers Jenn-Air Jenn 10 with practical, technician-backed advice.
A Jenn-Air dual-zone wine column is a precision cooling appliance, and how it’s installed has a direct effect on how stable its temperature and humidity control will be over years of use. Because these units are typically built into cabinetry, ventilation clearance and electrical setup deserve as much attention as getting the unit physically into place.
Understanding the Jenn-Air Wine Cooler Installation &
Below, our specialists break down everything you need to know about the Jenn-Air Wine Cooler Installation &.
Understanding the Jenn-Air Jenn 10
Below, our specialists break down everything you need to know about the Jenn-Air Jenn 10.
Ventilation Clearance Is the Most Overlooked Requirement
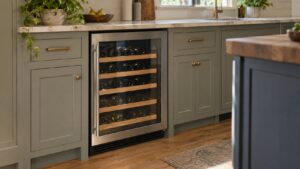
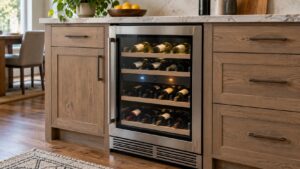
Built-in wine columns need airflow clearance around the unit — typically at the front through a vent grille, since the sides and back are usually enclosed by cabinetry — to allow the compressor and condenser to dissipate heat effectively. If this clearance is blocked or undersized, the cooling system works harder than it should, which can shorten compressor life and cause temperature instability inside the cabinet. This is the single most common installation mistake with built-in wine coolers and one of the leading causes of premature cooling failures.
Leveling Affects Both Function and Door Seal
A wine column needs to be level for its door to seal correctly against the cabinet frame — an unlevel unit can develop a gap at the door seal that lets warm air in, undermining the dual-zone temperature control the unit is designed to provide. Leveling also affects compressor operation, since these units are engineered to run most efficiently when sitting true.
Electrical Requirements
Wine columns typically run on a dedicated 120-volt circuit. Because these units often run continuously for years without being unplugged, using a circuit shared with other appliances that draw intermittent heavy loads can cause voltage fluctuations that affect the compressor over time. A dedicated circuit, verified during installation, avoids this entirely.
Allow the Unit to Stabilize Before Loading It
After installation, a wine column needs time — often 24 hours — to reach its target temperature and stabilize both zones before you load it with bottles. Loading a full collection immediately after power-on can cause the unit to run at maximum capacity for longer than necessary and makes it harder to spot a setup issue, since you can’t tell if slow cooling is a problem or just the initial stabilization period.
Door Swing and Access Clearance
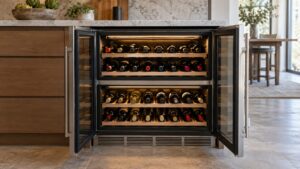
Confirm the cabinet opening allows the wine column’s door to swing fully open without hitting adjacent cabinetry or islands — this is easy to overlook during kitchen design but becomes an everyday annoyance if missed. Left-hinge and right-hinge configurations exist on some models specifically to solve this, so confirm hinge orientation before installation day.
Confirm Temperature and Humidity Settings
Once installed and stabilized, set each zone to its intended temperature — reds and whites typically call for different ranges — and confirm the humidity control, if your model has one, is functioning to protect cork integrity over long-term storage. This initial setup step is where a technician’s familiarity with the specific model pays off, since default settings aren’t always ideal for every collection.
Plan the Location Before Cabinetry Is Finalized
Because a built-in wine column depends so heavily on front-venting clearance and a dedicated circuit, its location should be settled early in a kitchen design rather than decided after cabinetry is already built. Retrofitting proper ventilation clearance into an existing cabinet run is far more disruptive than accounting for it during the original design and framing stage, and it often means removing and rebuilding sections of finished cabinetry that could have been avoided with earlier planning. Involving an installer during the design phase, rather than only at delivery, is the surest and least expensive way to avoid this kind of rework entirely.
Get It Installed by a Specialist
Ventilation clearance and leveling are the two details that most affect a wine column’s long-term reliability, and both are easy to get wrong without experience. Our technicians install Jenn-Air wine coolers with proper clearance, leveling, and initial calibration. Schedule an installation, browse our services, or check model-specific ventilation requirements. Jenn-Air’s official site provides current wine column cutout specifications.